Field notes · Look · Try · Compare
Noticing light along an outline
Follow a bright edge of hair and explore the background that helps it stand out.
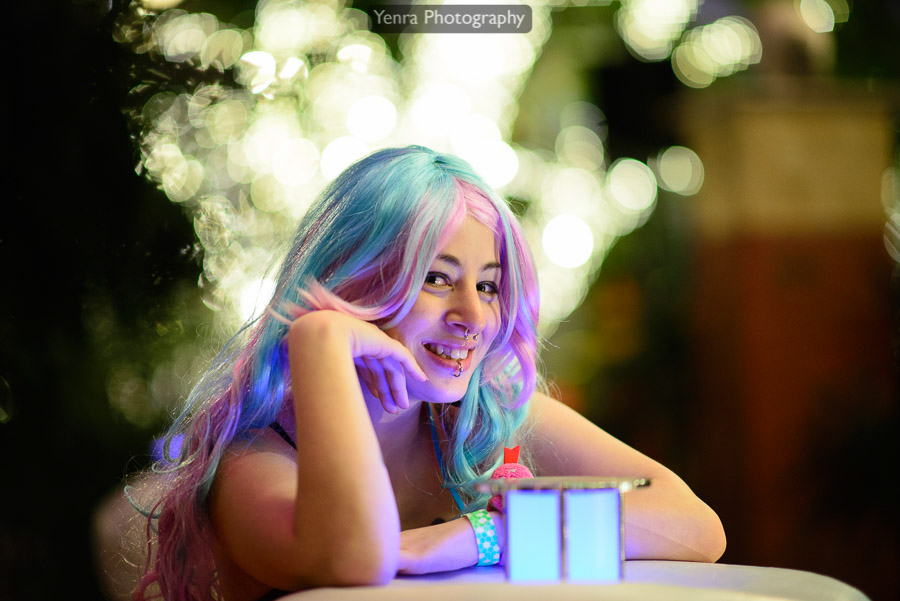
Woman with Pink and Blue Hair Sits at Table Outdoors · Photograph: Yenra
Captured: 2014:01:02 22:59:22
A fine bright edge can give you a small, rewarding place to begin looking at a portrait. Follow a few strands of hair, then look just beyond them. The background beside that edge helps determine how clearly you can see it.
Find a small bright edge
Pink, blue, and purple hair falls beside the model's face and shoulders. Fine strands catch the light, becoming especially clear where they meet darker areas behind them. Bright blurred lights occupy another part of the background.
Begin with a short section of the outline. Follow the strands near the shoulder, then move toward the top of the head. Some sections look crisp and bright; others meet a background of similar brightness and become more subtle.
Light near the edge of a subject is often called rim light. This photograph gives you visible edges to study, while leaving the original lighting arrangement open. You can enjoy what those edges contribute without needing to reconstruct the equipment or its position.
Try describing one small area in your own words: fine hair against dark green, a brighter curve near the crown, or a soft edge beside a pale light. Specific observations are useful starting points for your next photograph.
Compare the outline with what is behind it

Celebrating Her Victory · Photograph: Yenra
Captured: 2014:01:02 23:00:06
In this second photograph, the model raises one hand and holds a badge with the other. Thin bright strands stand out beside the darker background, while a cluster of lights fills the upper right. The outline moves through several different tones.
Look at the hair and the background as a pair. A bright strand beside a dark area creates a visible difference. A similarly bright background can make that same kind of strand harder to separate. Neither needs to become a problem to fix; each gives the picture a different relationship between person and surroundings.
A bright patch behind the head is also something to notice, but it plays a different role from light visible on the hair itself. Trace the actual strands and then look at the background lights. Learning to distinguish those two features can make your observations more precise.
With a willing model near a familiar window, make a comfortable first portrait. Then move slightly to one side and watch what sits behind the hair. Keep an eye on the face as well. You may discover a useful variation through position alone.
Give the edge room in the frame
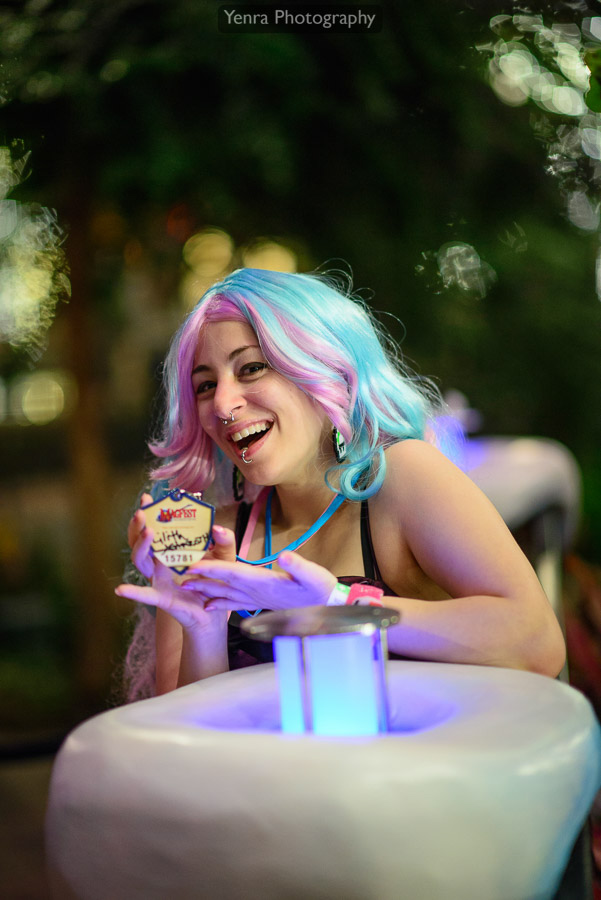
Woman with Pink and Blue Hair Displays Wooden Object · Photograph: Yenra
Captured: 2014:01:02 23:00:24
The vertical photograph includes more of the table and more space around the model. Much of the background near the head is dark, while brighter lights remain toward the upper right. That extra room lets you follow the outline within a larger arrangement.
Compare the three complete photographs rather than treating them as a controlled lighting test. Their gestures, framing, and backgrounds differ. Use each as an invitation to notice one visible relationship: a fine strand, the tone beside it, or the space around the head.
For your own experiment, keep the model comfortable and try two nearby viewpoints. You can use a phone or the camera you already have. A short section of illuminated hair is enough; there is no need for an unbroken glow around the whole figure.
Look back at both pictures and describe where the edge is easiest to follow. Which view gives the face and surroundings a balance you enjoy? Keep that observation alongside the photographs, and let it suggest one small variation for next time.
Look back with curiosity.
- Where is the bright edge easiest to follow?
- What happens when the background becomes brighter?
- Which small viewpoint change would you like to explore next?
Keep exploring
Seeing light in a portrait · Exploring light and dark portrait backgrounds · Noticing light and dark shapes
Browse the complete MAGFest 2014 gallery.