Field notes · Look · Try · Compare
Checking visibility in a group portrait
Check each person’s chosen face, mask or costume detail from the camera position, then explore one small change.
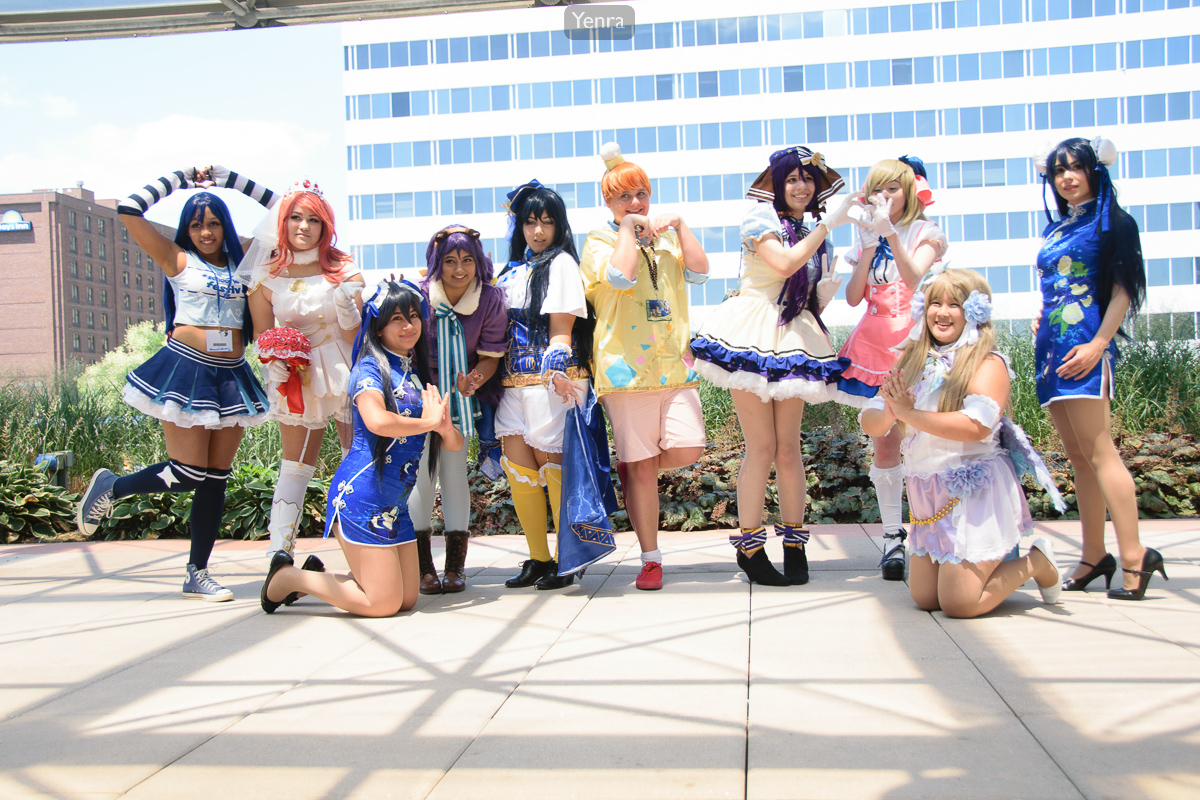
Otakon 2015 photograph 6286 · Photograph: Yenra
Captured: 2015:07:24 13:41:41
A group portrait gives several people a place in one picture. Before making a frame, take a moment to look for each person from your camera position. A face, mask or favorite costume detail can disappear behind a nearby shoulder, hand, headpiece or part of the setting, even when the overall arrangement looks lively.
These three Otakon 2015 photographs offer different arrangements to explore. They are separate pictures, not a before-and-after correction. Begin with what you can see, then decide with your own collaborators what they would like to make visible.
Scan people before the whole shape
Follow the nine visible faces from left to right. Some sit lower in the frame, while others appear above or between them. The costume colors and gestures connect the group, but checking the picture person by person helps you notice details that the larger shape can hide.
For your own photograph, agree on what each participant wants included. A mask may be central to a costume; a deliberately turned face can belong to the idea. Ask about those choices before trying to make everyone face the same direction. Then scan the arrangement through the camera, including the people near the edges.
Work through a larger group in rows
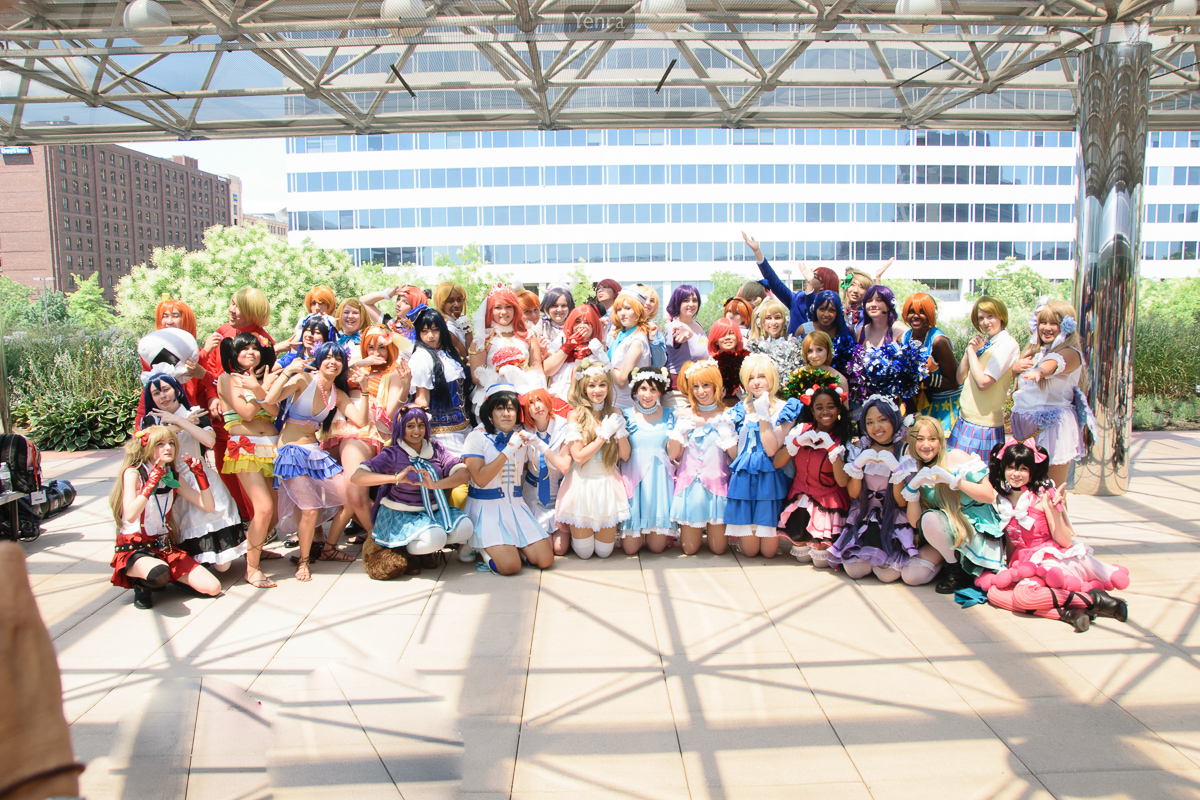
Otakon 2015 photograph 6406 · Photograph: Yenra
Captured: 2015:07:24 13:57:50
The larger group has foreground and rear rows, with faces appearing at several heights. Give your eyes a simple route: one row from left to right, then the next. Look at each face or chosen feature individually. Watch where another person's hair, hand or costume meets it.
A small sideways shift can open a view between two people. You might move the camera slightly, or invite one participant to choose an easier position. Keep the rest of the arrangement similar while comparing the change. Comfortable standing or seated positions are enough; nobody needs to kneel or copy the archive arrangement. After the change, scan everyone again, because opening one view can close another.
Include the setting in the check
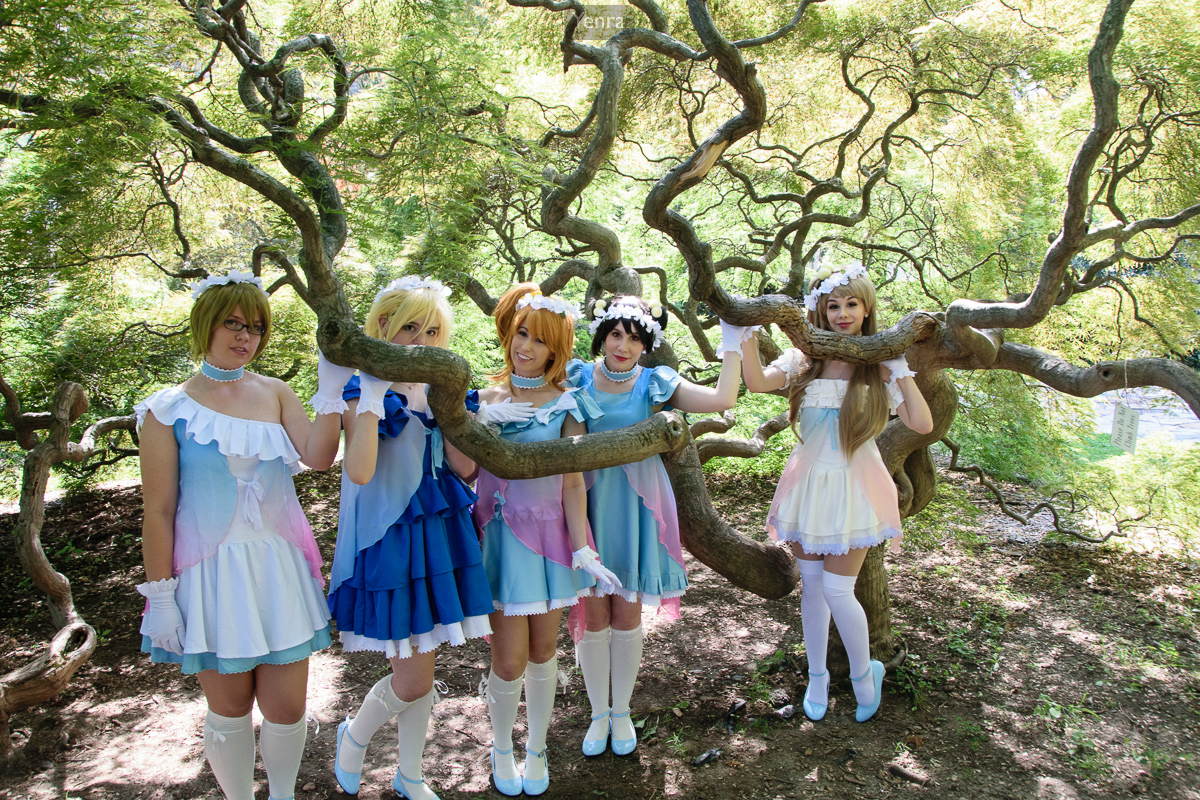
Otakon 2015 photograph 6452 · Photograph: Yenra
Captured: 2015:07:24 16:02:51
A branch crosses part of the lower face of the second person from the left, while the eyes remain visible. Elsewhere, the branches curl around and between the people. The setting contributes strongly to this portrait. A partial view can be something you enjoy keeping, rather than something that always needs correction.
When making your own picture, name the overlap before changing it: “the branch crosses the lower face.” Ask whether that fits the portrait you want. If you would like another version, try a small sideways move or a comfortable camera-position change. Leave the surroundings as they are; there is no need to move branches or climb. Compare the whole arrangement again, including hands and important costume details.
Visibility and sharpness are separate checks. A face can be unobstructed and still lack the detail you hoped to show. Review each chosen face, mask or feature at a useful size after checking the overlaps. The costume depth-of-field lesson offers a next experiment. The different camera settings recorded with these archive photographs do not establish a controlled focus comparison or a single aperture to copy.
Look back with curiosity.
- Which face, mask or feature was easy to overlook in the first scan?
- What changed after the small move?
- Which overlap adds to the portrait and which would you explore differently?
Keep exploring
Photographing people together · Choosing a portrait background · Choosing depth of field for a costume portrait
Explore the complete Otakon 2015 gallery and find another arrangement you would enjoy looking through one person at a time.