Field notes · Look · Try · Compare
Photographing people together
Follow spacing, shared gestures, and small actions, then explore a short sequence with willing collaborators.
A photograph of people together contains many small relationships: the spaces between them, the directions they look, a repeated gesture, or an action they share. Start with one relationship that interests you. Invite the people you are photographing to help shape it, then explore a few versions together.
Let a shared gesture travel through the picture.
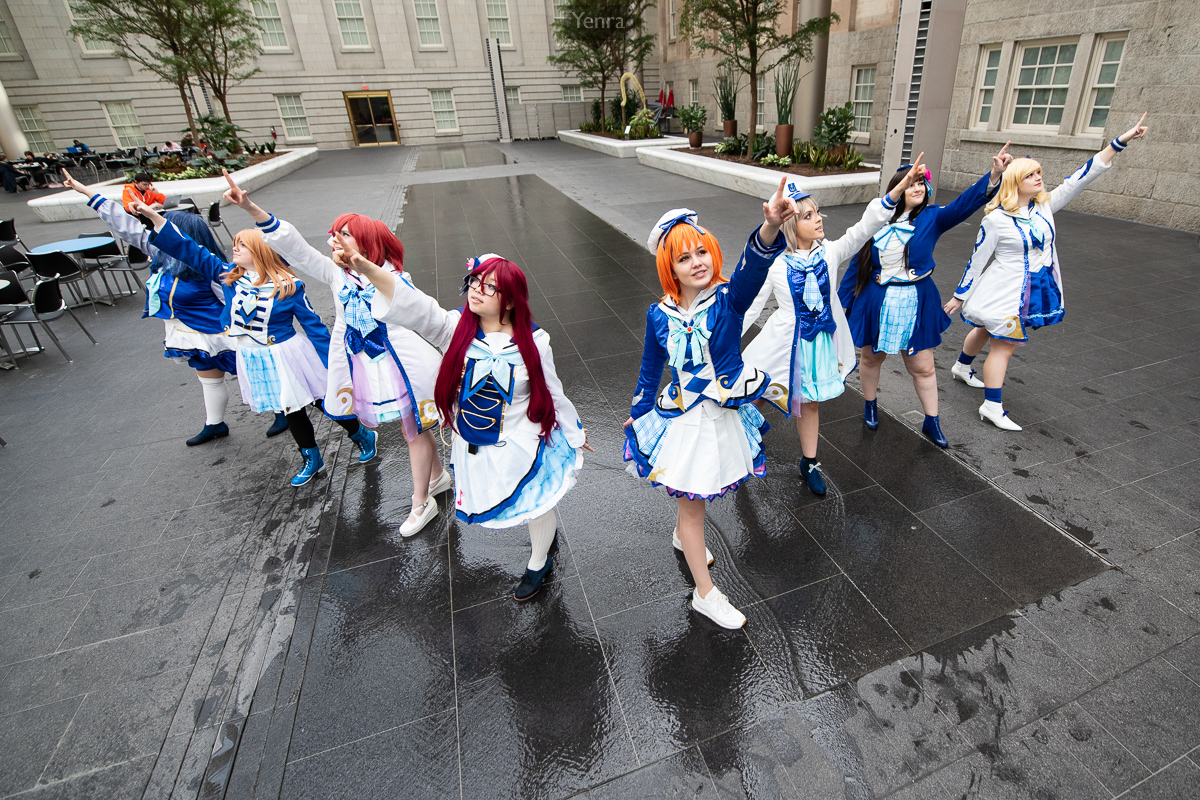
Aquamarine Idols, Aqours Dance Cover Group · Photograph: Yenra · Credit: Aquamarine Idols
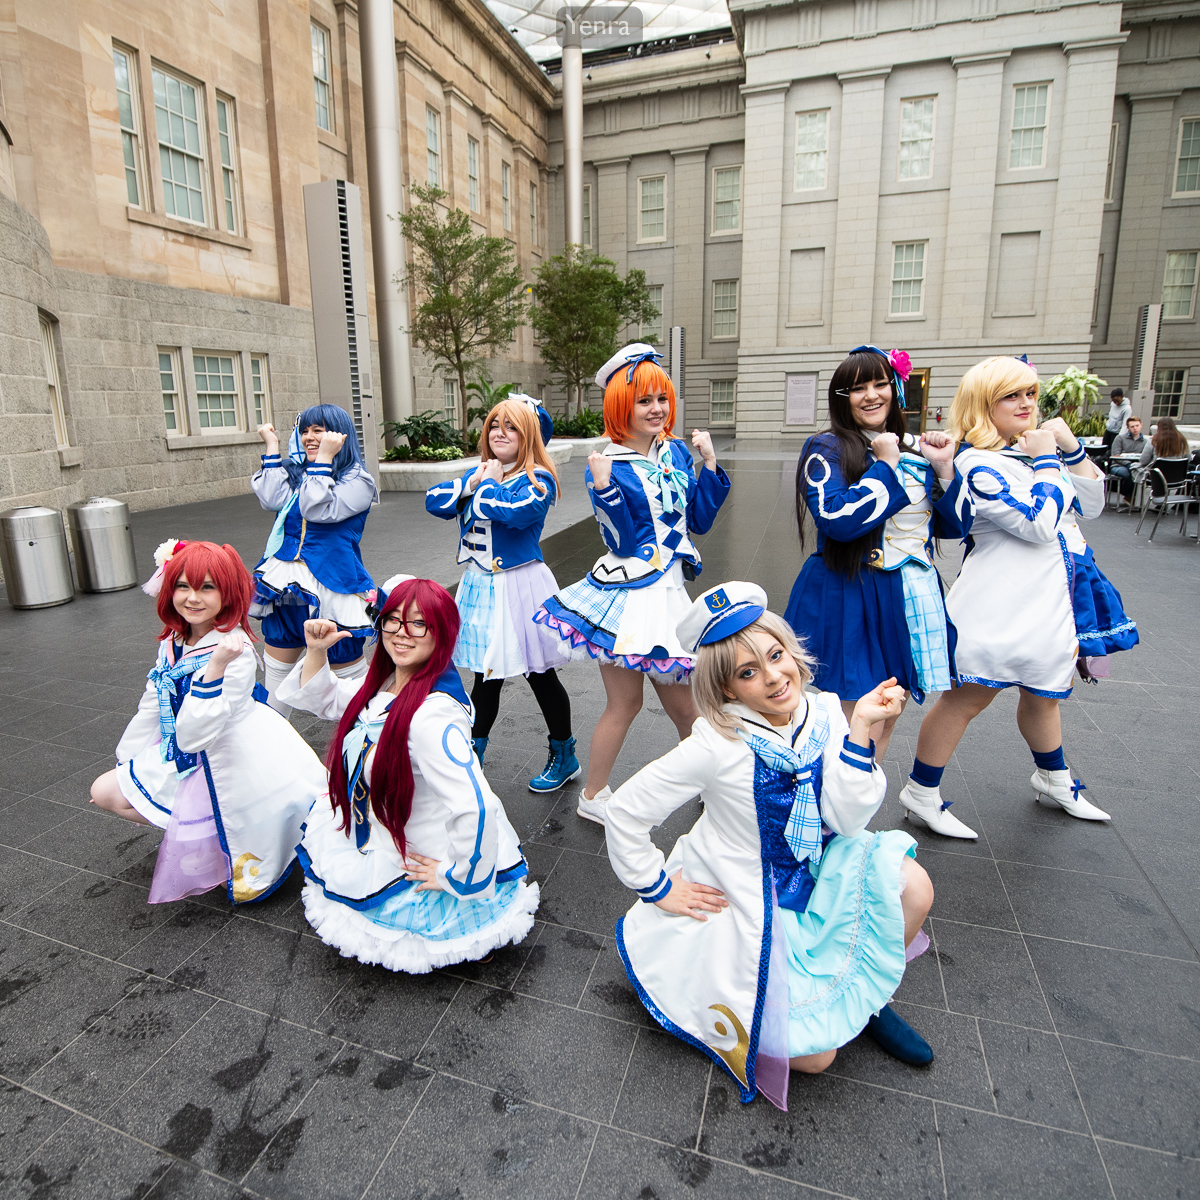
Aquamarine Idols, Aqours Dance Cover Group · Photograph: Yenra · Credit: Aquamarine Idols
In the wider Aquamarine photograph, raised arms repeat across the group. The people spread across the courtyard, leaving spaces through which you can see the floor and the setting. Blue and white costumes connect the figures, while each person's position contributes to the larger shape.
The closer arrangement brings faces, hands, and costume details nearer. Standing and lower positions create several levels within the group. Your eye can move from one expression to another while the shared colors hold the photograph together.
These frames combine different arrangements, gestures, and viewpoints. Look at what each version offers. One gives the shared action room to stretch across the scene; the other invites a closer look at the people within it. Both can be useful ways to describe a group.
Find a connection in a smaller group.
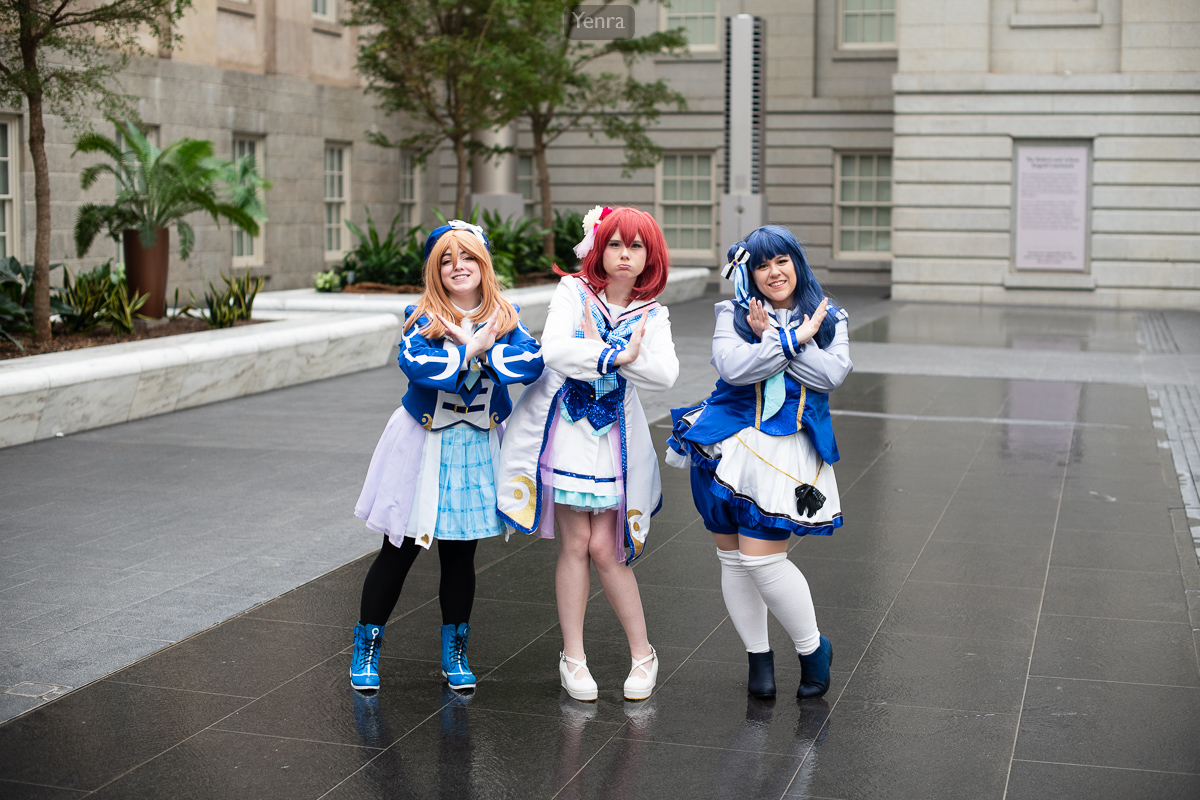
Hanamaru, Ruby, and Yoshiko, Love Live Sunshine · Photograph: Yenra
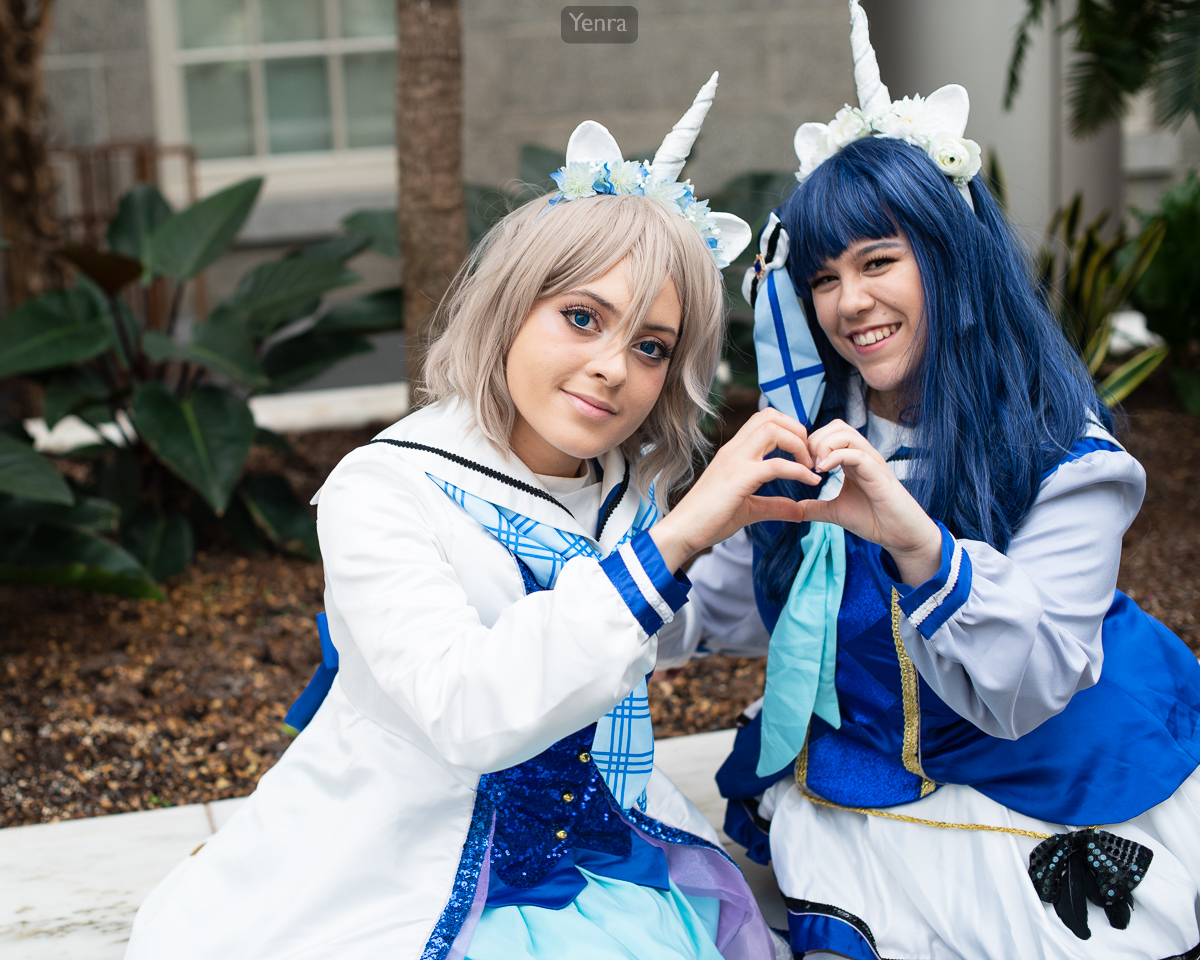
Unicorn Blizzard You and Yoshiko, Love Live Sunshine · Photograph: Yenra
The trio repeats a hand shape near each face. There is a common idea to follow, along with different expressions and small changes in stance. The open floor around them gives their grouped shape a clear place within the scene.
In the close pair, two sets of hands meet to make a heart. The hands become a shared point of attention beneath the faces. The closer framing also brings the costume colors and headpieces into view as a connected arrangement.
A shared action can be as small as looking toward the same thing, turning a little toward one another, or holding a prop together. Ask what feels natural or playful to the people involved. Their ideas may suggest a photograph you would enjoy making together.
Make room for everyone to contribute.
Begin with a comfortable arrangement. Check how the people, hands, and important costume or clothing details appear from your camera position. A small shift by you or a participant may make a detail easier to see. Try that change, make a frame, and show the group what you are exploring.
Different heights and levels can add variety when everyone enjoys the position. Chairs or a simple standing arrangement can offer plenty to work with. Let each person choose how they would like to participate, and leave room for a pause or another idea.
Try a short sequence with two or three people.
- Agree on a starting point. Choose a comfortable place and a simple arrangement. Ask what the group would like the photograph to feel like.
- Make a first frame. Notice the spaces between people and how their faces and hands appear together.
- Invite one shared action. Try a direction of gaze, a small repeated gesture, or a prop the group wants to use.
- Explore another arrangement. Change the spacing or orientation, or move your camera to include more of the setting. Keep checking that everyone feels comfortable.
- Review together. Ask which photographs each person enjoys and what they would like to try next. Use those responses to guide another short sequence.
Notice what connects the group.
- Which gesture, color, or direction of gaze brings the photograph together?
- Where can you see each person's contribution most clearly?
- Which change would the group enjoy exploring again?
Record a favorite discovery in the field practice notebook, then explore the complete Aquamarine Idols gallery. For more ideas, continue with gesture and expression, working together for a portrait, or a pause between poses.