Field notes · Lenses
Lenses I Own and Love
Explore framing, viewpoint, distance, and backgrounds through real photographs, alongside Yenra’s original lens notebook.
A lens gives you a way to frame the world. Your position gives the objects in that world their relationship to one another. Exploring the two together can help you decide how much place, detail, and space you want in a photograph.
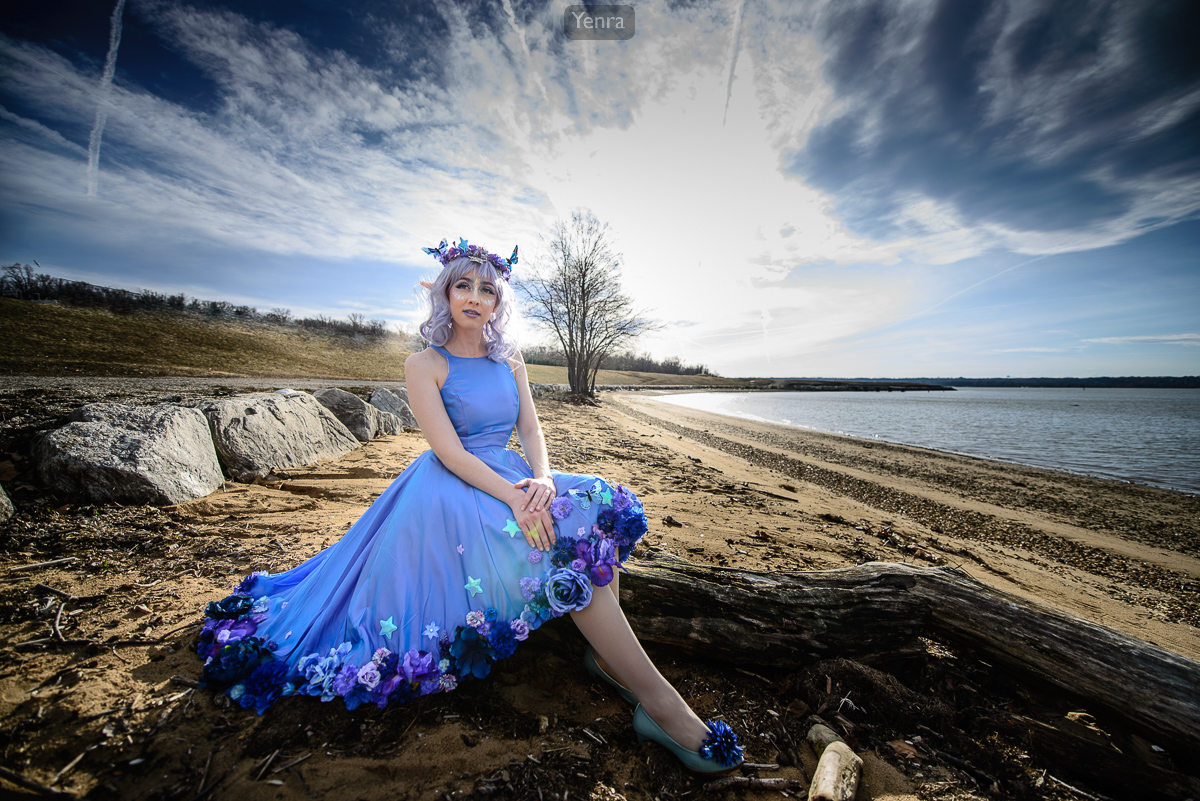
Blue Fairy · Photograph: Yenra · Credit: SunsetDragon
Start with the relationship you want to show.
Blue Fairy includes the person, the spread of the dress, the shore, and a large area of sky. Its record gives a 14 mm focal length on a Nikon D600. A broad angle of view makes room for the setting, while the chosen viewpoint gives the foreground and distance their relative sizes.
From one camera position, changing focal length changes how much of the scene fills the frame. Moving the camera changes the relationship between near and distant elements. Try keeping those two decisions separate for a few photographs, then combine them to find the composition you enjoy. Nikon’s focal-length explanation is a useful reference for angle of view and framing.
Explore a closer view of expression and detail.

Angelic Lolita Fashion in Studio · Photograph: Yenra Photography
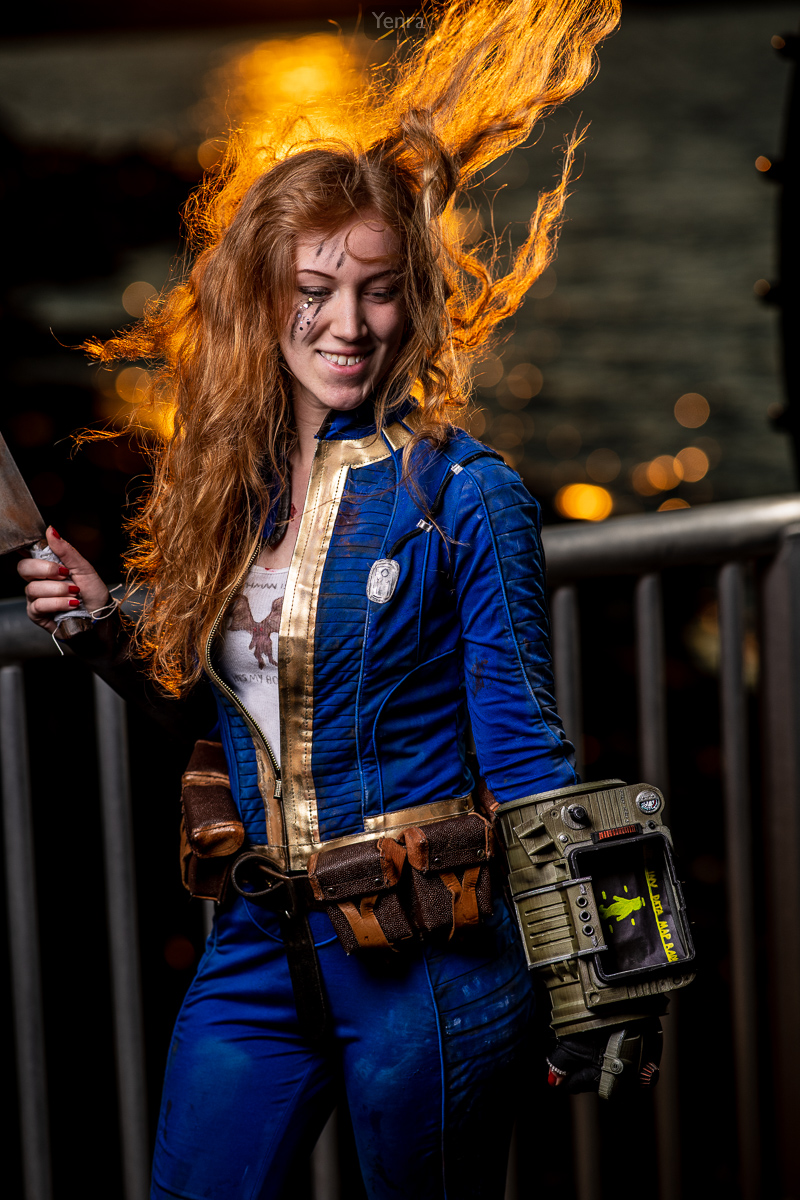
Vault Dweller at Sunset, Fallout · Photograph: Yenra
The close Sakura Angelic portrait gives room to the eyes, hand, headpiece, and costume details. The MAGFest portrait includes more of the figure and the bright movement of the hair. Both records give a 105 mm lens at f/2.8, yet the subjects, framing, and surroundings give each picture its own character.
Use examples like these to imagine possibilities for a lens you already have. A close view might emphasize a small gesture; a wider view might let a costume or location tell more of the story. Try a few distances together with the person you are photographing and compare what becomes important in each frame.
Notice what happens behind the subject.
Look at the size of background details as well as how sharp they appear. If you step farther from a person and use a longer focal length to keep their size similar in the frame, the background can appear larger relative to them. That change comes from your new viewpoint together with the adjusted framing.
Focus distance, aperture, focal length, and the scene’s distances all contribute to the appearance of background blur. Start with an exposure that works in your light, then change one thing and look again. You can explore these relationships with a zoom, a fixed-focal-length lens, or a phone. The useful discovery is what a particular choice contributes to your picture.
Try a viewpoint and framing notebook.
- Choose a subject with a background you can recognize. A person beside a path, or an object with a row of trees behind it, gives you useful depth to observe.
- Make one frame from a comfortable position. Record the focal length if your camera provides it.
- Stay in place and change the framing. Use a different focal length, or compare a crop afterward. Notice which parts of the scene are included.
- Change your position for another photograph. Move farther away and adjust the focal length or framing so the subject appears a similar size.
- Compare the background relationships. Look at the relative sizes of objects, the spaces between them, and the edges of the frame. Add one sentence about what you like.
Keep these small comparisons together. Over time, they become a practical record of how your equipment and your choices work together. Continue with Exploring bokeh or the wide-angle portrait lesson.
From Yenra’s earlier notebook
Lenses I Own and Love
The original personal lens notes are preserved below. They describe the equipment and perspective at the time of that writing, including the consideration of a Z8.
All of my lenses are from Nikon - for the FX system (before mirrorless). I'm sticking with my Nikon D850 as long as I can. Thinking of the Z8 for sure, but holding steady for now.
- Nikon AF-S NIKKOR 14-24mm f/2.8G ED Lens (my ultrawide lens, with interesting edge distortion)
- Nikon AF-S NIKKOR 20mm f/1.8G ED Lens (very close focusing - star-like pattern when light glints)
- Nikon AF NIKKOR 24mm f/2.8D Lens (I called it my Katsucon lens because I got the Gazebo and Atrium with it)
- Nikon AF-S NIKKOR 24-70mm f/2.8E ED VR Lens (middle of the Nikon trinity of lenses, great all-around)
- Nikon AF-S NIKKOR 200mm f/2G ED VR II Lens (superlative portrait lens, super heavy but lovely)
- Nikon AF NIKKOR 35mm f/2D Lens (I called it my Pittsburgh lens when I first got it)
- Nikon AF-S Nikkor 50mm f/1.4G Autofocus Lens (my nifty fifty)
- Nikon AF-S NIKKOR 58mm f/1.4G Lens (very special out-of-focus bokeh, less clinical than the 50)
- Nikon AF-S NIKKOR 70-200mm f/2.8E FL ED VR Lens (the last FX version we'll see)
- Nikon AF-S NIKKOR 85mm f/1.4G Classic Portrait Lens (what I call my beauty lens)
- Nikon AF-S VR Micro-NIKKOR 105mm f/2.8G IF-ED Lens (superb macro lens)
- Nikon AF-S NIKKOR 105mm f/1.4E ED Lens (possibly even better than the 85mm)
- Nikon AF-S NIKKOR 200-500mm f/5.6E ED VR Lens (wildlife photography champion)
- Nikon AF-S NIKKOR 300mm f/2.8G ED VR II Lens (such a gorgeous lens)
On top of some of these, I place the Nikon AF-S Teleconverter TC-14E III for a nice extension while maintaining quality.