Field notes · Look · Try · Compare
Planning a small wall display of photographs
Try spacing and alignment with three photographs and a simple paper sketch.
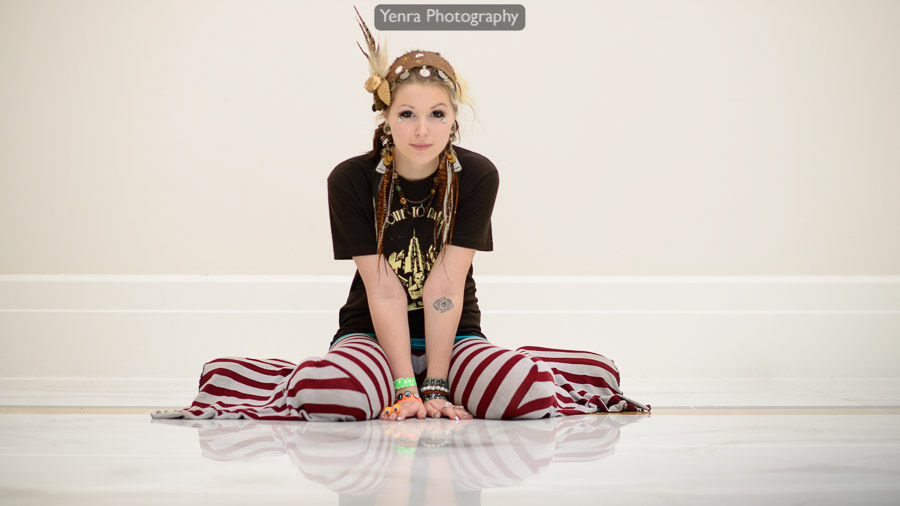
Young Woman in Minimalist Setting · Photograph: Yenra
Captured: 2014:01:04 12:21:50
A small wall display lets several photographs share your attention at once. Before printing or hanging anything, try a simple sketch. Give each picture a shape on paper and explore how alignment and space help the group feel connected.
The three MAGFest 2014 photographs here form a new editorial grouping for this lesson. They remain complete photographs in their original archive; the suggested arrangements are possibilities to explore.
Give each photograph a place in the group
This wide photograph includes a seated model, striped trousers, and a reflection on the pale floor. The shape stretches sideways, with space around the figure. It offers a broad starting point for the proposed group.
Choose three photographs of your own that you would enjoy seeing together. They might share a person, a place, a color, or an afternoon you want to remember. Begin with the pictures themselves and a small reason for keeping them together.
Note the space available for a possible display. Then sketch rectangles that match the photographs' proportions. Paper shapes can help you try an arrangement while leaving the original files and framing intact.
Try a shared top edge or a shared center line
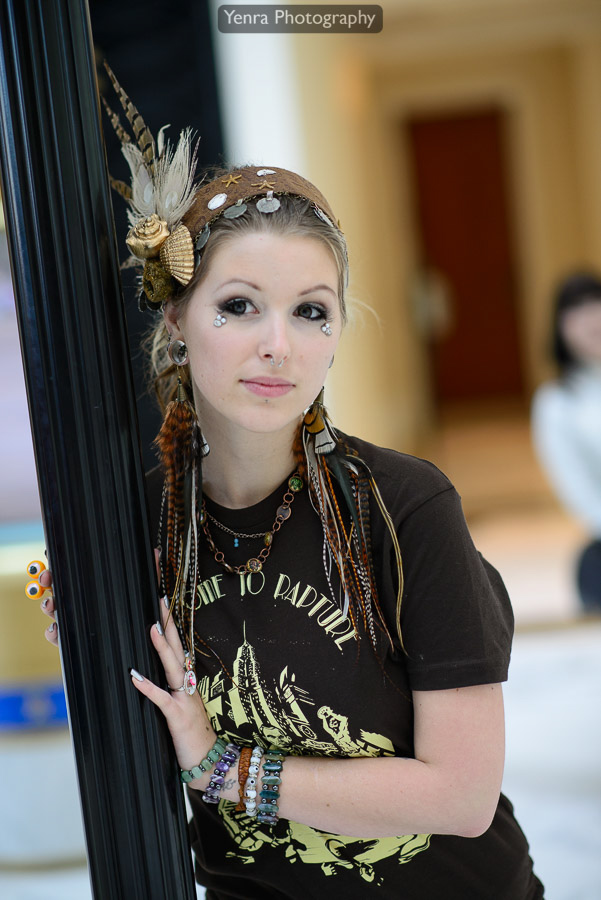
Young Woman in Hallway · Photograph: Yenra
Captured: 2014:01:04 12:25:01
The vertical portrait brings a taller shape into the group. The face, headpiece, earrings, and bracelets invite a closer look. Beside the wide photograph, it creates a difference in height that becomes part of the arrangement.
For a first comparison, keep the same three pictures in the same order and use equal image-box widths and equal gaps. Try lining up their top edges. Then try aligning the centers of the image rectangles. This changes one spatial relationship while keeping the rest steady.
The sketches below use the photographs' original proportions. They show layout choices rather than physical print sizes. Each label links to the corresponding photograph; the full images appear once in this lesson.
A shared top edge makes a clear horizontal starting line, with different amounts of space below each picture. Center alignment lets the wide images sit beside the middle of the taller portrait. Follow those edges and spaces, and notice which arrangement you enjoy for this group.
Step back and leave room between pictures
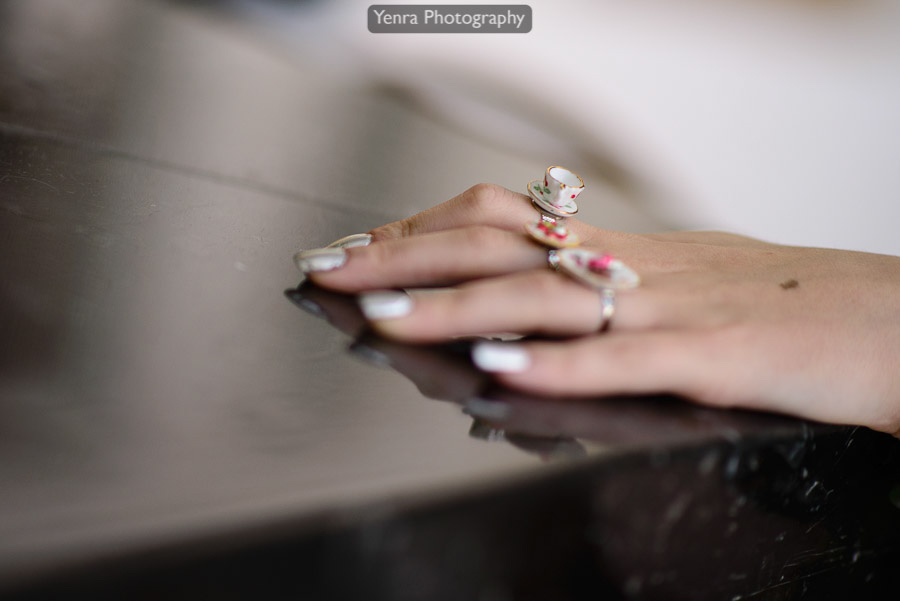
Woman's Hand with Teacup Rings on Black Surface · Photograph: Yenra
Captured: 2014:01:04 12:28:03
The small rings and their reflection give this photograph a different scale of attention. Within the proposed group, the detail offers something to discover after the wider figure and closer portrait.
Step back from your paper arrangement and look at the whole group. Then move closer and look at each shape in turn. Does one picture seem crowded? Would a little more space let the group breathe? Keep the gaps equal at first, then save a separate sketch if you want to explore another spacing.
Give yourself time to compare. You can leave both arrangements on paper, photograph the sketches, or save a brief note about the one you prefer. The sketch can remain the finished experiment; printing is a later choice.
If you eventually choose prints, use the real display space and available image dimensions to guide that separate decision. For now, you have discovered something useful about how these photographs sit together. Keep the originals and let your preferred arrangement become a starting point for another small variation.
Look back with curiosity.
- Which photograph draws your attention first in each arrangement?
- How does alignment change the feeling of the group?
- How much space would help each picture remain easy to enjoy?
Keep exploring
Reviewing photographs at different sizes · Keeping alternative selections for a photo collection · Pairing a portrait with a detail
Browse the complete MAGFest 2014 gallery.