Field notes · Look · Try · Compare
Finding frames within a photograph
Explore openings, nearby edges, and layers around a subject, then try three views through an everyday doorway.
A doorway, a window, or the space between two nearby objects can give you a second frame inside a photograph. Start with the opening you can see. Notice how it leads toward the person or object beyond, then explore what happens when you move a little.
Look through one opening toward another.
Artemis by Ruins · Photograph: Yenra · Credit: Gillian Foxglove
Artemis by Ruins · Photograph: Yenra · Credit: Gillian Foxglove
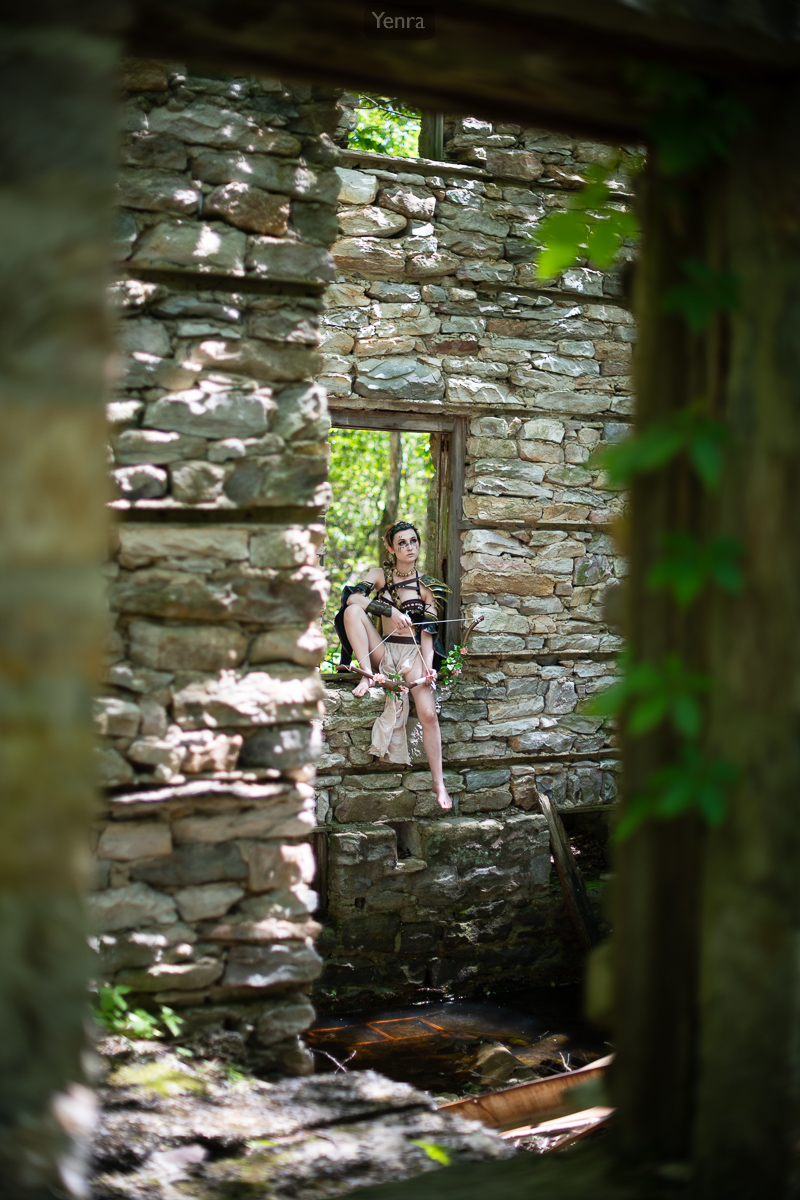
In the first photograph, soft dark edges surround a more distant stone window. The person sits within that smaller opening, with green woodland visible beyond. Your eye can travel through several layers: the near edge, the wall, the person, and the trees.
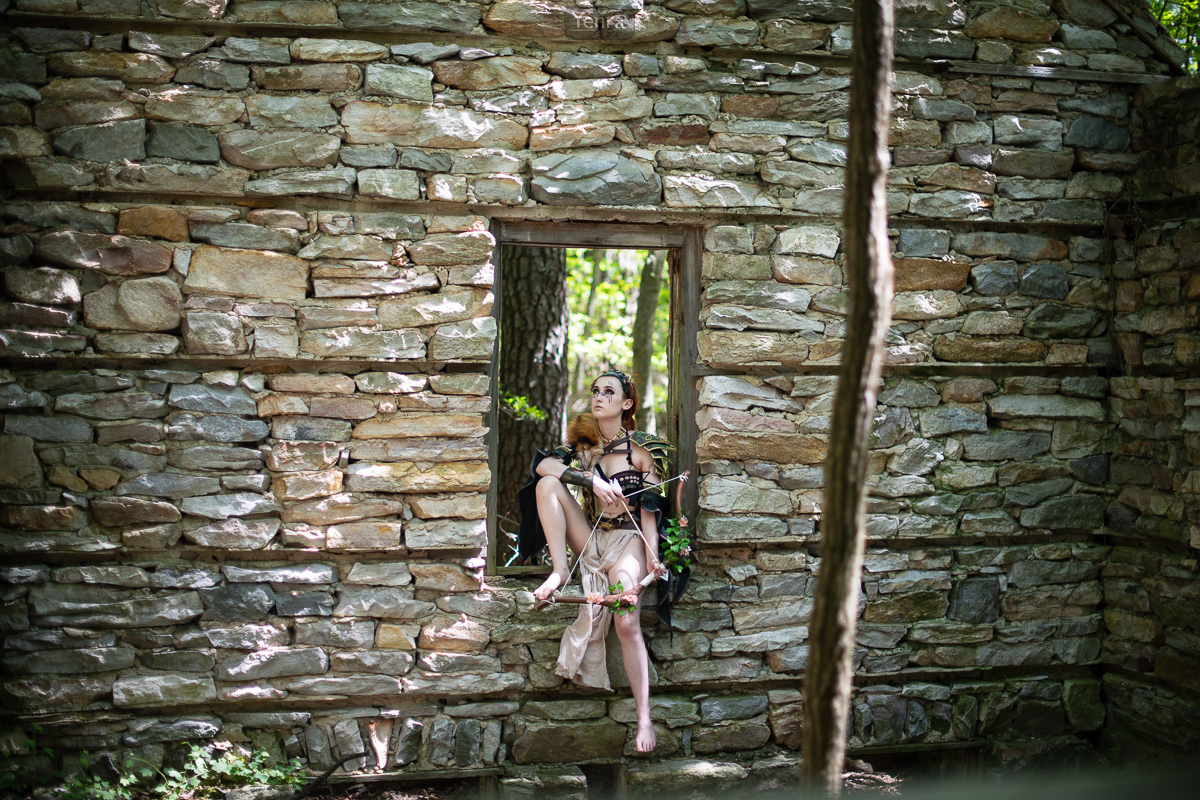
The wider photograph opens up the wall. More stonework is visible on either side of the window, and a narrow foreground edge crosses the view to its right. The person has a smaller place within a broader arrangement of texture and rectangles. Each view offers a different way to encounter the same setting.
Compare the space around the figure. Which view makes you linger on the surrounding stone? Which makes the distant window feel like a place you are looking into? Orientation, viewpoint, and the amount of setting all contribute to these two photographs. Let their differences suggest choices you might enjoy exploring.
Choose how much of the frame to include.
Artemis by Ruins · Photograph: Yenra · Credit: Gillian Foxglove
Artemis by Ruins · Photograph: Yenra · Credit: Gillian Foxglove
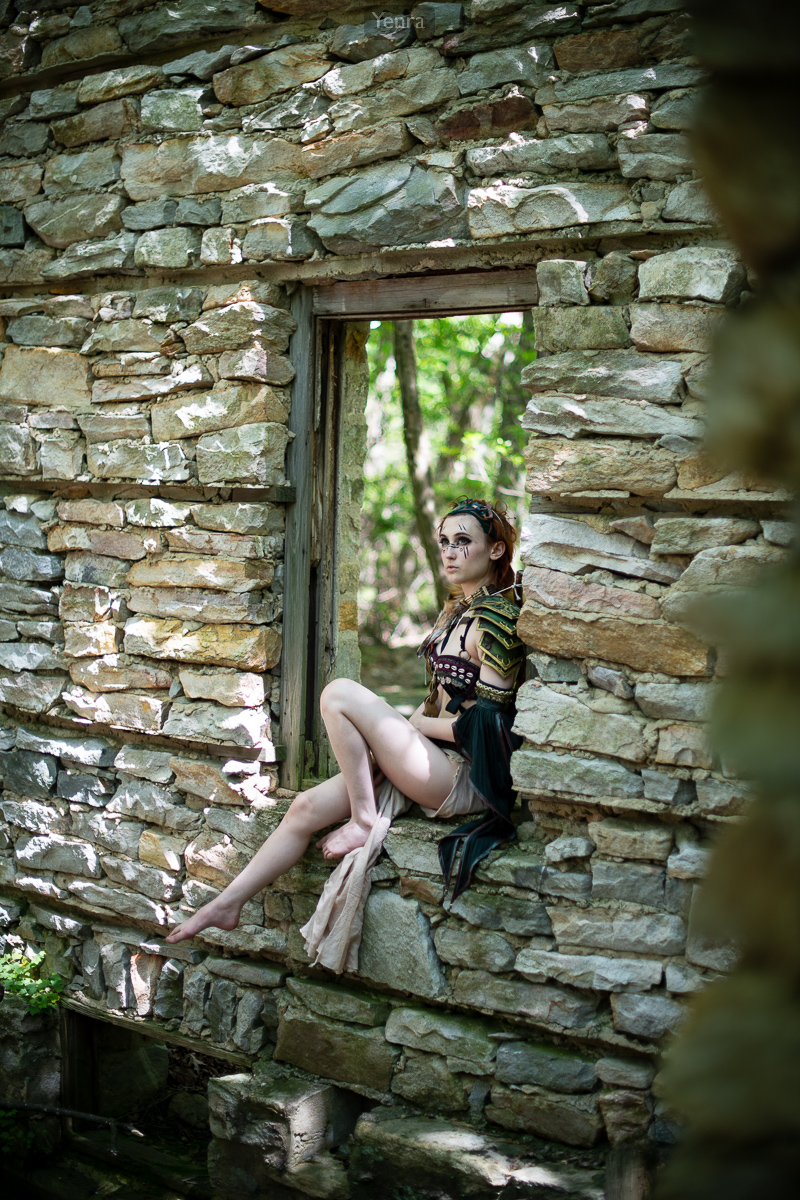
In the closer window portrait, the stone opening still surrounds the person, while the extended legs cross its lower edge. A soft area on the right adds another nearby layer. The window is both a boundary and a shape the figure extends beyond.
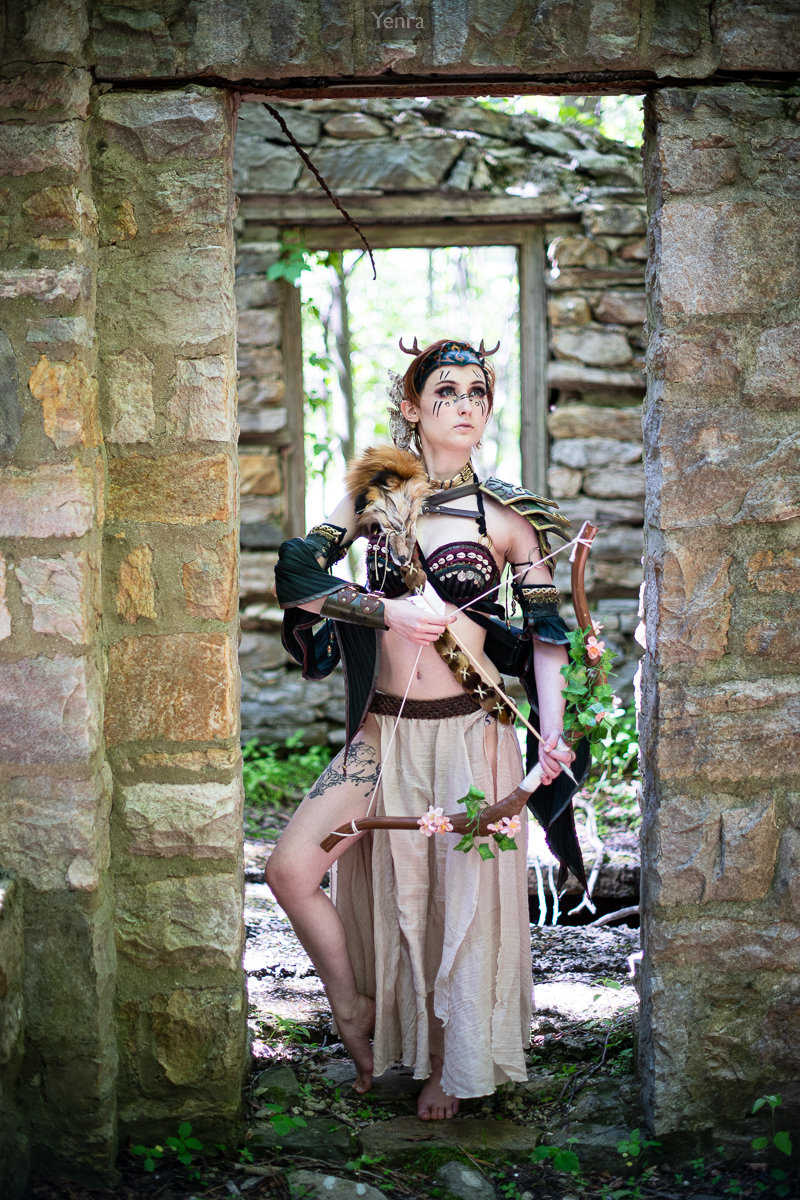
In the doorway portrait, the stone sides take up more of the photograph. A second rectangular opening appears behind the standing person. Repeated openings give the eye a route through the picture, while the curved bow and costume details introduce other shapes within them.
A frame can be complete, partial, crisp, or soft. It can hold a person in a small part of the scene or sit close to the edges of a larger portrait. You can explore these relationships with an ordinary room, a garden, or a familiar view through a window.
Give the edges a moment of attention.
Before making a photograph, look around its four sides. See where a nearby object enters, where an opening ends, and where your subject meets those shapes. Move slightly and watch the relationships change. You might keep an edge because it adds depth, or open the view because you enjoy more room around the subject.
Then return your attention to the person or object. The surrounding frame has a useful role when it helps you show something you care about: an expression, a gesture, a small detail, or the feeling of looking into another space.
Try three views through an everyday opening.
- Choose a simple scene. Place an object where you can see it through a doorway, or work with a willing portrait partner. Choose a comfortable standing or seated viewpoint.
- Make a starting view. Include part of the opening and enough of the subject to show what caught your eye.
- Move a little sideways. Watch the near edge move in relation to the subject. Make another photograph when you find a relationship you enjoy.
- Open the view. Try including more of the room or surroundings. Let the opening occupy a different amount of the picture.
- Compare the three photographs. Choose one version to explore further, and make a small adjustment suggested by what you see.
Follow the path your eye takes.
- Where do you look first, and where do you look next?
- What does the nearby edge add to the view beyond?
- How much of the setting helps tell the story you want?
Keep a sentence about your discoveries in the field practice notebook. Explore the complete Forest, Ruins, Studio gallery, continue with portrait backgrounds, or look at what different portrait framings include.